Why Prep Matters: The Adhesion “Chain”
Long-lasting extensions depend on a simple chain: clean nail plate → controlled cuticle area → correct surface texture → dry, oil-free surface → compatible bonding system. If any link is weak, lifting usually starts at that point (often the cuticle line or sidewalls). Prep is not about making the nail “thin”; it’s about creating a stable, contaminant-free surface with the right amount of micro-texture so your chosen system can anchor.
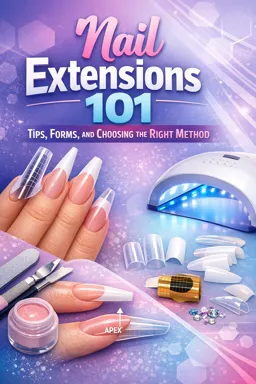
Prep Checkpoints (Use Before Any Extension Method)
- Skin/nail safety: no open cuts, infections, or suspicious discoloration; client can comfortably tolerate prep.
- Cuticle zone: non-living tissue removed; living tissue intact; no redness, burning, or “ring of fire.”
- Surface texture: evenly etched, not shiny, not gouged; no thin spots.
- Cleanliness: no dust in sidewalls/cuticle pocket; no oils/lotions; no touching the nail after cleansing.
- Dryness: nail looks matte and feels squeaky-clean; no dampness from cleanser or water.
- Product control: primer/bond applied sparingly, not flooding skin; correct product for the system and client.
(1) Consultation Checks: Safety and Suitability Before You Touch the Nail
Consultation is part of prep because it prevents avoidable adhesion issues and protects client health. Many “mystery lifting” cases are actually product incompatibility, skin sensitivity, or a nail condition that should not be covered.
Micro-steps: Consultation That Supports Adhesion
- Ask about allergies and sensitivities: reactions to gel, acrylic, adhesives, latex, fragrances, or disinfectants. What it accomplishes: helps you choose lower-risk products and avoid triggering contact dermatitis.
- Ask about medications and lifestyle: frequent handwashing, cleaning chemicals, swimming, gym/chalk, oily skincare use. What it accomplishes: identifies higher contamination/moisture exposure so you can emphasize dehydration, sealing, and aftercare.
- Inspect the nail and surrounding skin: look for redness, swelling, weeping, splitting, severe peeling, green/black discoloration, thickening, lifting of the natural nail plate, or pain. What it accomplishes: determines whether service is appropriate and reduces the risk of trapping moisture/pathogens under enhancements.
- Check for trauma habits: picking, biting, using nails as tools. What it accomplishes: sets realistic retention expectations and informs reinforcement choices later.
When to Pause and Refer (Do Not Cover)
- Suspected infection (odor, green/black discoloration, pus, heat, swelling, significant pain).
- Open wounds, bleeding, or severe inflammation around the nail folds.
- Sudden major nail changes (rapid thickening, separation, unusual pigmentation) without a known cause.
- History of severe allergic reaction to nail products (especially repeated itching, blistering, or rash after services).
(2) Cuticle Area Management: Remove Non-Living Tissue Without Over-Prepping
The cuticle area is the most common starting point for lifting because product cannot adhere to skin or non-living tissue. Your goal is to remove the invisible, non-living tissue on the nail plate and tidy the proximal nail fold area—without thinning the nail plate or injuring living tissue.
Key Concept: “Non-Living Tissue” vs “Living Tissue”
- Non-living tissue (true cuticle) is a thin, translucent layer that grows onto the nail plate. Product sticks to it poorly and it can peel away, taking your enhancement with it.
- Living tissue includes the proximal nail fold and healthy skin. Overworking it causes redness, sensitivity, and increased oil/moisture—both reduce adhesion.
Micro-steps: Repeatable Cuticle-Zone Routine
Dry pushback (gentle, controlled): With a pusher, glide from the center toward sidewalls using light pressure. Accomplishes: exposes the cuticle line and reveals tissue that must be removed.
Detail the sidewalls: Use small, precise movements; avoid digging. Accomplishes: clears the “pocket” where tissue and oils hide—common lifting zone.
Continue in our app.- Listen to the audio with the screen off.
- Earn a certificate upon completion.
- Over 5000 courses for you to explore!

Download the app
Remove non-living tissue from the nail plate: Use your chosen safe method to lift and remove the thin film on the plate. Accomplishes: ensures product bonds to nail keratin, not dead tissue.
Refine only what’s necessary: If skin looks pink, shiny, or irritated, stop. Accomplishes: prevents inflammation-driven oil/moisture that undermines retention.
Over-Prepping Warning Signs (Stop and Reassess)
- Redness, heat, or stinging during prep.
- A “ring” of raw-looking skin at the cuticle line.
- Nail plate looks patchy-white and overly abraded near the cuticle.
Prep Checkpoint: Cuticle Zone
Pass criteria: cuticle line is clean and crisp; no visible tissue on the nail plate; sidewalls are clear; client feels no burning; skin is intact.
(3) Surface Prep: Correct Etching Level, Dust Removal, and Dehydration
Surface prep is controlled roughening (etching) plus removing everything that blocks adhesion: dust, oils, moisture, and residue. The correct texture is uniformly matte—not shiny, not scratched deeply.
Micro-steps: Surface Prep You Can Repeat Every Time
Shape the free edge (if needed) before etching: Keep the natural nail stable and even. Accomplishes: reduces micro-fractures and prevents later splitting that can trigger lifting.
Lightly etch the nail plate: Use minimal pressure and consistent strokes; focus on removing shine evenly. Avoid concentrating pressure at the center or near the cuticle. Accomplishes: creates micro-anchors for product without thinning the nail.
Detail the perimeter: Carefully etch close to (but not into) the cuticle line and sidewalls. Accomplishes: prevents “halo lifting” where the perimeter remains shiny or contaminated.
Dust removal (two-stage): First, brush thoroughly; second, cleanse to remove fine dust. Accomplishes: dust acts like a barrier layer—product bonds to dust, then lifts.
Dehydrate: Apply a dehydrator/cleanser appropriate to your system and allow it to fully flash off. Accomplishes: temporarily removes surface moisture and oils so primer/bond can interact with the nail plate.
What “Proper Etching” Looks Like
| Surface appearance | Meaning | Fix |
|---|---|---|
| Shiny patches remain | Under-prep; product may lift from smooth areas | Re-etch lightly until uniformly matte |
| Deep grooves/scratches | Over-prep; weakens nail and can cause heat/sensitivity | Reduce pressure; use lighter, even strokes |
| Patchy white, thin-looking near cuticle | Overworked cuticle zone | Stop; avoid further abrasion; adjust technique next service |
| Matte but dusty | Dust barrier likely | Brush + cleanse again; keep sidewalls clean |
Contamination Traps to Avoid During Surface Prep
- Touching the nail after cleansing: skin oils transfer instantly.
- Water exposure mid-service: even quick hand rinsing can rehydrate the nail plate.
- Lotions/cuticle oils before service: can linger in sidewalls and cause early lifting.
- Dirty tools or dusty environment: reintroduces particles right before bonding.
Prep Checkpoint: Surface and Cleanliness
Pass criteria: nail is evenly matte; perimeter is etched; no visible dust in sidewalls/cuticle pocket; nail has been cleansed and not touched; dehydrator has fully evaporated.
(4) Primer/Bond Selection Logic: Choosing the Right “Bridge”
Primers and bonding agents are not interchangeable across all systems. Think of them as a bridge between the nail plate and the product chemistry. The right choice improves retention; the wrong choice can cause lifting or irritation.
Decision Guide: What Are You Bonding With?
- Gel systems: often use a bonding agent/base designed to chemically link layers within that brand/system. Goal: create a compatible foundation layer that adheres to the nail and to the builder/overlay.
- Systems that use primer: primer improves adhesion by altering the nail surface energy and/or creating a stronger anchor for the product.
Acid-Free vs Acid-Based Primer (Where Relevant)
| Type | Typical use case | Strengths | Cautions |
|---|---|---|---|
| Acid-free primer | Most clients with normal nails; clients prone to sensitivity | Gentler; good everyday adhesion support | May be insufficient for very oily/problem nails if other prep steps are weak |
| Acid-based primer | Selective use for persistent lifting/oily nail plates when compatible with the system | Stronger etching/anchoring effect | Higher irritation risk; must be applied sparingly and never on skin; not ideal for sensitive clients |
Micro-steps: Applying Primer/Bond Correctly
Confirm the nail is fully dry and matte: primer on a damp nail can trap moisture. Accomplishes: prevents hidden moisture that leads to lifting.
Use minimal product: wipe excess from the brush; apply a thin, controlled layer. Accomplishes: avoids pooling, which can cause lifting and skin irritation.
Keep off the skin: leave a tiny margin at the cuticle and sidewalls. Accomplishes: reduces allergic sensitization risk and prevents “product on skin” lifting.
Allow proper flash-off/cure (per system): some primers air-dry; some bonding agents require curing. Accomplishes: ensures the layer performs as designed instead of mixing unpredictably with the next layer.
Prep Checkpoint: Primer/Bond Layer
Pass criteria: primer/bond is thin and even; no shine from pooling; no contact with skin; correct dry/cure step completed before moving on.
(5) Common Adhesion Failures Traced Back to Prep Errors
When lifting happens, diagnose by location and timing. Most retention problems can be traced to a specific prep step that was skipped, rushed, or overdone.
Failure Map: What You See vs What It Usually Means
| What you notice | Likely prep cause | How to correct next time |
|---|---|---|
| Lifting at cuticle line within days | Flooded cuticle; product touched skin; non-living tissue left behind | Improve cuticle cleaning; leave margin; apply thinner base/primer; control product with less on brush |
| Lifting at sidewalls | Sidewall tissue/dust left; perimeter not etched; client touches hair/face during service | Detail sidewalls; brush/cleanse thoroughly; remind client not to touch nails after cleanse |
| Lifting in the center (“pocket lifting”) | Over-buffing/thinning; uneven etch; contamination under product | Use lighter pressure; aim for uniform matte; cleanse and dehydrate properly |
| Product pops off cleanly like a sticker | Under-prep (shine left); dehydration skipped; primer/bond incompatible or omitted | Re-check matte finish; ensure dehydrator flash-off; use correct bonding agent for system |
| Chipping at free edge | Free edge not cleansed/etched; dust trapped; moisture exposure | Etch and cleanse the free edge; cap/seal as appropriate to method; avoid water during service |
| Client reports burning/itching around cuticle after service | Over-prep; primer on skin; product flooded cuticle; potential sensitivity developing | Reduce cuticle abrasion; apply primer sparingly; keep product off skin; reassess product choices |
Self-Audit: Rapid Prep Checklist (Read Before Applying Any Product)
1) Consultation: any red flags? (infection, open skin, severe reaction history) → stop/referral if yes. 2) Cuticle zone: non-living tissue removed; no redness; sidewalls clean. 3) Surface: uniformly matte; no shiny patches; no deep scratches. 4) Dust: brushed + cleansed; no debris in cuticle pocket/sidewalls. 5) Dehydration: fully flashed off; nail not touched afterward. 6) Primer/bond: correct type for system; ultra-thin; off the skin; correct dry/cure done.