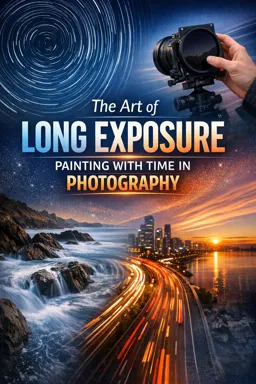
What Filters Actually Do in Long Exposure
Purpose and mental model: In long exposure, filters are not “effects” first; they are exposure-control tools that let you choose a shutter speed for motion rendering without being forced into extreme aperture or ISO choices. Think of a filter as a controlled reduction (or shaping) of light before it hits the sensor. Neutral Density (ND) reduces light across the frame; a polarizer selectively reduces polarized reflections and can deepen skies; combining them changes both exposure and the look of surfaces like water, foliage, glass, and wet rocks.
Why this chapter focuses on filters, not basics: You already know how shutter speed, aperture, and ISO interact. Here we focus on filter selection, accurate “stop math,” workflow, and the common failure modes that cause soft images, color casts, banding, or uneven skies—especially with variable ND and polarizer stacking.
ND Filters: Fixed Strength, Predictable Results
What “ND” means in practice: A fixed ND filter is rated by optical density (ND0.3, ND0.6, ND0.9…) or by stops (1-stop, 3-stop, 6-stop, 10-stop, 15-stop). Each stop halves the light. Fixed NDs are the most predictable way to extend shutter speed because the attenuation is consistent across the frame and across the rotation of the filter.
Stop math you can do in the field
Convert a metered shutter speed to a filtered shutter speed: Multiply the time by 2 for every stop of ND. Example: If your unfiltered exposure is 1/60 s and you add a 6-stop ND, your new shutter is 1/60 × 2^6 = 1/60 × 64 ≈ 1.07 s. If you add a 10-stop ND, 1/60 × 1024 ≈ 17 s.
- 3-stop ND: 1/125 → 1/15 (approx.)
- 6-stop ND: 1/125 → ~0.5 s
- 10-stop ND: 1/125 → ~8 s
- 15-stop ND: 1/125 → ~4 min
Practical tip: When you’re near whole seconds, rounding is fine. When you’re in multi-minute territory, be more precise and consider using a timer or intervalometer. If your camera shows only 30 s max, you’ll be in Bulb/Time mode for stronger NDs.
- Listen to the audio with the screen off.
- Earn a certificate upon completion.
- Over 5000 courses for you to explore!

Download the app
Choosing ND strength by subject and intent
Match the filter to the motion you want: Instead of thinking “I need a 10-stop,” think “I want 2 seconds” or “I want 2 minutes,” then choose the ND that gets you there under current light.
- Water texture (streams, small falls): often 0.5–2 s for visible flow lines without turning everything to mist.
- Ocean smoothing with some structure: often 1–8 s depending on wave period; longer can erase wave shape.
- Cloud streaking: typically 30 s to several minutes; higher ND helps in daylight.
- People removal in busy scenes: 10–60 s can thin crowds; 2–5 minutes can erase most movement if people keep walking.
Step-by-Step: A Reliable Fixed-ND Workflow
Step 1 — Compose and focus before mounting heavy ND: Strong NDs can make the viewfinder/EVF dim and can slow autofocus. Compose and focus without the ND first. If you use autofocus, lock focus (AF-L) or switch to manual focus to prevent refocusing after the filter is on.
Step 2 — Meter without the ND: Take a test exposure without the ND (or with a weak ND) to confirm highlights and overall exposure. This is your baseline shutter time.
Step 3 — Calculate the new shutter time: Apply stop math (2^stops). Many photographers keep a small conversion table on their phone. For example, baseline 1/8 s with a 10-stop becomes 1/8 × 1024 = 128 s (2 min 8 s).
Step 4 — Mount the ND and block stray light: Attach the filter carefully to avoid cross-threading. For long exposures, stray light can leak through the viewfinder (DSLR) or gaps in adapters. Use a viewfinder cover or your hand/cloth to block it if you see unexplained haze or bright streaks.
Step 5 — Shoot and evaluate for color cast and flare: Strong NDs can introduce a color cast (often warm or magenta/green). Check the histogram and also inspect shadows for lifted fog-like flare. If you see a veil, shade the lens with a hood or your hand (without entering the frame).
Step 6 — Refine with small changes: If you need slightly longer shutter without changing ND, you can stop down a bit or lower ISO (within your camera’s true base ISO). If you need shorter shutter, open aperture or reduce ND strength. Keep changes deliberate so you can repeat results.
Common ND Problems and How to Prevent Them
Color casts and white balance drift: Not all ND glass is perfectly neutral. To manage this, shoot RAW and set a consistent white balance (avoid Auto WB if it shifts between frames). For critical work, create a custom WB with the filter on, or plan to correct in post using a neutral reference in the scene.
Loss of contrast from flare: Long exposures often happen in bright conditions (sun near frame, reflective water). Add a lens hood, keep filters clean, and avoid stacking more glass than necessary. Even a thin film of salt spray can turn highlights into a milky wash during a multi-minute exposure.
Vignetting from stacking: Wide-angle lenses and thick filter rings can darken corners, especially when stacking ND + polarizer. Use slim-mount filters, larger filter size with step-up rings, or a square filter system to reduce mechanical vignetting.
Uneven density with ultra-wide lenses: Very wide fields of view can show uneven sky brightness even with a perfect ND, simply due to the sky’s natural gradient and angle to the sun. This becomes more pronounced when you add a polarizer (covered below). Compose with this in mind and check corners for unnatural darkening.
Variable ND Filters: Convenience with Real Risks
How variable ND works: A variable ND is essentially two polarizing elements stacked. Rotating changes how much light is blocked. This makes it fast for video and run-and-gun stills, but it introduces polarizer-related artifacts that fixed ND filters avoid.
The main risks of variable ND
1) X-pattern / cross polarization: At higher densities, many variable NDs produce a dark “X” or uneven blotches across the frame, especially on wide lenses. This happens because polarization effects vary across the field of view, and the filter reaches a point where it can’t attenuate evenly. If you see an X, reduce density (rotate back) or switch to a fixed ND.
2) Uneven skies and strange gradients: Because variable ND is polarization-based, it can darken parts of the sky unevenly depending on sun angle. This can look like a patchy sky that is difficult to correct later.
3) Color shifts that change with rotation: Many variable NDs shift color as you rotate them. That means two exposures at different densities may not match in color, complicating series work (timelapse, panoramas, exposure brackets for blending).
4) Interaction with reflections: Since it behaves like a polarizer, a variable ND can unintentionally reduce reflections on water or glass at some settings and not others. This can be a creative tool, but it can also change the scene in ways you didn’t intend.
When variable ND is acceptable (and when it isn’t)
Good use cases: Moderate densities (often 2–5 stops), longer focal lengths, scenes without large blue sky areas, and situations where speed matters more than absolute uniformity.
Avoid or be cautious: Ultra-wide lenses, high densities near the maximum setting, critical landscape work where sky uniformity matters, stitched panoramas, and any workflow requiring consistent color across frames.
Step-by-Step: Using a variable ND without surprises
Step 1 — Set a “safe range”: Before a serious shoot, test your variable ND at your common focal lengths. Identify the rotation range where no X-pattern appears. Mark that range with a small dot or tape.
Step 2 — Compose and check the sky: If the frame includes a lot of sky, rotate the filter while watching for uneven darkening. If you can’t get a natural look, switch to fixed ND and (optionally) a separate polarizer.
Step 3 — Lock density before final framing: After you set the density, avoid bumping the ring. Re-check density after any handling, because a small rotation can change exposure by a stop or more.
Step 4 — Standardize white balance: Use a fixed Kelvin WB for a series. Variable ND color can drift with rotation; fixed WB makes correction more consistent later.
Polarizers in Long Exposure: Control Reflections, Not Just Skies
What a polarizer changes: A circular polarizer (CPL) reduces polarized reflections and can increase saturation in foliage by cutting glare. In long exposure, this is often more important than darkening the sky. Wet rocks, leaves, and water surfaces can look richer and more detailed when glare is controlled.
Polarizer behavior you must anticipate
Sky darkening depends on sun angle: The strongest effect is roughly 90 degrees from the sun. With wide-angle lenses, different parts of the sky are at different angles, so the effect becomes uneven—one part of the sky may go very dark while another stays bright.
Reflections can be removed—or preserved: Cutting reflections can reveal what’s under the water surface, but reflections can also be a key compositional element (mirrored clouds, leading lines). Decide what you want before you rotate the CPL to “maximum.”
Exposure impact: A CPL typically costs about 1–2 stops of light. Treat it like a mild ND that also changes scene contrast and reflections.
Integrating ND + Polarizer: Best Practices
Order and system choices: If you use screw-in filters, you’ll often stack CPL and ND. If you use a square system, you may have a dedicated rotating polarizer in the holder plus fixed ND squares. The goal is: (1) easy rotation of the polarizer, (2) minimal vignetting, (3) minimal flare.
Step-by-Step: Stacking fixed ND with a CPL
Step 1 — Decide the reflection look first: Set the CPL effect before you commit to the final shutter time. Rotate the CPL while watching reflections on water/foliage. Stop where it looks intentional, not necessarily maximum.
Step 2 — Re-meter after setting CPL: Because CPL changes exposure, take a quick meter reading (or test shot) with the CPL set. This becomes your new baseline for ND calculations.
Step 3 — Add fixed ND and compute final shutter: Now apply your ND stop math. Example: With CPL on, you meter 1/30 s. Add a 10-stop ND: 1/30 × 1024 ≈ 34 s.
Step 4 — Watch for vignetting and corner softness: After stacking, check corners at your working focal length. If you see dark corners, zoom in slightly, remove one filter, or switch to slimmer rings / a larger filter size with step-up rings.
Step 5 — Control flare aggressively: Stacking increases the number of air-glass surfaces. Shade the lens, keep filters spotless, and avoid shooting directly into strong light unless you want the veiling effect.
Why “Variable ND + CPL” is usually a bad stack
Polarizer-on-polarizer conflicts: Variable ND already uses polarizing elements. Adding a separate CPL can create unpredictable attenuation, strong unevenness, and severe color shifts. If you need both reflection control and heavy light reduction, prefer a fixed ND plus a CPL, or a filter system designed to integrate a polarizer cleanly.
Practical Scenarios and Filter Recipes
Scenario 1: Midday waterfall with wet rocks and bright highlights
Goal: Keep texture in water while controlling glare on rocks. Recipe: CPL first to reduce rock glare and reveal detail; then a 3–6 stop fixed ND to reach ~0.5–2 s. Workflow: Rotate CPL until rock highlights calm down; re-meter; add ND; shoot; check that whites in water aren’t clipping and that the water still has structure.
Scenario 2: Seascape with moving clouds and reflective wet sand
Goal: 1–3 minute exposure for cloud streaks while keeping a pleasing reflection on sand. Recipe: Use CPL gently (do not fully kill reflections), then 10–15 stop fixed ND depending on light. Workflow: Set CPL for partial reflection; meter; compute multi-minute shutter; shoot; review for flare and for unnatural sky darkening (if wide angle, reduce CPL strength or recompose).
Scenario 3: City scene where you want to “erase” pedestrians but keep car light trails minimal
Goal: 10–30 s exposure to thin crowds without turning traffic into dominant streaks. Recipe: Fixed ND 6–10 stops depending on ambient light; CPL usually optional unless reflections in glass are distracting. Workflow: If glass reflections are messy, add CPL and set it subtly; then choose ND to land in the 10–30 s range; shoot multiple frames because pedestrian density changes moment to moment.
Scenario 4: Forest stream under canopy with dappled light
Goal: Smooth flow while keeping leaf detail and avoiding blown highlights in sun patches. Recipe: CPL is often more valuable than heavy ND because it reduces leaf glare; add a 3-stop ND only if needed. Workflow: Rotate CPL to reduce sparkle on leaves; meter; choose modest ND; consider taking several exposures as sun patches shift, aiming for controlled highlights.
Filter Quality, Handling, and Field Discipline
Optical quality matters more when stacking: Cheaper filters can be fine alone, but stacking magnifies issues: softness, flare, and color cast. If you regularly stack CPL + strong ND, prioritize good coatings and slim mounts.
Keep a clean routine: Carry a blower, microfiber, and a small cleaning solution. Clean the filter before long exposures; dust and spray can create glowing specks and lowered contrast that are hard to fix later.
Use step-up rings strategically: Buying one high-quality filter size (for your largest lens) plus step-up rings can reduce cost and vignetting. The tradeoff is more mechanical complexity and potential for stuck rings; carry a rubber jar-opener band to help remove tight filters.
Label and standardize: If you own multiple NDs, label them clearly by stops. In the field, confusion between a 6-stop and 10-stop can waste time and cause missed light. Standardizing your kit (for example: CPL + 3-stop + 6-stop + 10-stop) makes decisions faster.
Quick Reference: Decision Guide
- Need maximum predictability and even frames: fixed ND.
- Need speed and moderate reduction, minimal sky: variable ND in its tested safe range.
- Need reflection control on water/foliage: CPL, set intentionally (not always maximum).
- Need heavy reduction plus reflection control: fixed ND + CPL (avoid variable ND + CPL).
- Shooting ultra-wide with lots of sky: be cautious with CPL strength; check for uneven sky.