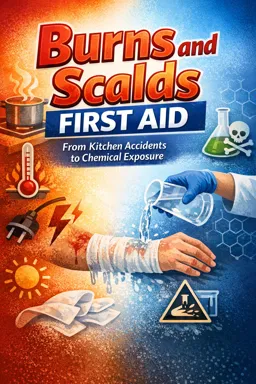
1) When and how to cool a thermal burn
Concept: Cooling is about stopping ongoing heat damage in the skin and deeper tissues. The goal is to remove heat gently and steadily—fast enough to limit injury, but not so cold that it causes additional harm.
Step-by-step: cooling with cool running water
- Start as soon as possible. Cooling is most effective when begun immediately, but it can still help even if started later (for example, after you move away from the heat source).
- Use cool running water. Aim for a steady stream of cool (not icy) tap water over the burned area.
- Cool for about 20 minutes. A common practical target is 20 minutes of cooling. If pain relief is significant earlier, continue if the person remains warm and comfortable; if the person becomes cold or starts shivering, pause and prioritize warmth.
- Keep the water gentle. Avoid high pressure that can irritate damaged skin.
- Position for comfort and coverage. If possible, keep the burned area under the water while the rest of the body stays dry and warm (e.g., sit by a sink, run water over a hand while wearing a jacket).
- Do not scrub. Let water flow over the area; do not rub with cloths or sponges.
Comfort considerations: Cooling should reduce pain. If the person reports increasing pain from the cold, the water may be too cold or the person may be getting chilled—adjust to a slightly warmer “cool” temperature and protect the rest of the body from heat loss.
| Do | Avoid |
|---|---|
| Cool, gentle running water | Ice, ice packs directly on skin |
| ~20 minutes when feasible | Short “splash and go” cooling only |
| Keep the person warm overall | Soaking large areas in cold water for long periods |
2) If running water is unavailable: clean cool compresses
Concept: If you can’t access a tap (outdoors, travel, power outage), you can still remove heat using clean, cool, wet materials. The key is continuous cooling—compresses warm up quickly and must be refreshed.
Step-by-step: cooling with compresses
- Use a clean cloth or dressing. Ideally sterile gauze or a clean cotton cloth. Avoid fluffy materials that shed fibers.
- Wet with cool clean water. Bottled drinking water is suitable. If water quality is uncertain, prioritize cooling but use the cleanest source available.
- Apply gently to the burn. Lay the compress on—do not press hard.
- Refresh frequently. Re-wet or replace as soon as it warms (often every 30–60 seconds at first). The cooling effect depends on keeping the compress cool.
- Continue for about 20 minutes total. Track time on a phone/watch if possible.
Practical example: On a hike, someone spills hot soup on their thigh. Move to a safe spot, pour cool drinking water over the area if you can. If water is limited, use a clean bandana soaked in water and keep re-wetting it while insulating the rest of the person with a jacket.
3) Preventing hypothermia during cooling (especially in children)
Concept: Cooling a burn can unintentionally cool the whole body. Children lose heat faster than adults, and prolonged exposure to cold water or wet clothing can lead to dangerous chilling. Effective first aid balances burn cooling with keeping the person warm.
- Listen to the audio with the screen off.
- Earn a certificate upon completion.
- Over 5000 courses for you to explore!

Download the app
Practical steps to reduce heat loss
- Cool only the burned area. Keep the rest of the body dry and covered with warm layers or a blanket.
- Remove wet clothing away from the burn. Wet fabric cools the body rapidly. If clothing is stuck to the burn, leave that part in place (see section 6).
- Use a warm environment if possible. Close windows, move away from wind, and sit the person down.
- Watch for shivering and pale/cold skin. If shivering starts, reduce cooling intensity (slightly warmer “cool” water, shorter intervals) and increase warming measures around the rest of the body.
- For infants/young children: Prioritize keeping the child warm while cooling the burn locally. A caregiver can hold the child wrapped in a dry blanket while the burned limb is cooled under a gentle stream.
Rule of thumb: Cool the burn, not the person.4) Why ice and very cold water can harm tissue
Concept: Extreme cold causes blood vessels to constrict, reducing blood flow to already-injured tissue. It can also cause cold injury (frostbite-like damage) on top of the burn. This can deepen the injury and increase pain.
Common myths clarified
- Myth: “Ice stops the burn faster.” Reality: Ice can cause additional tissue damage and may worsen outcomes.
- Myth: “The colder the better.” Reality: Cooling should be cool, not freezing. Very cold water can increase discomfort, trigger shivering, and raise hypothermia risk—especially with larger burns or in children.
- Myth: “Ice packs are fine if wrapped.” Reality: Even wrapped ice can overcool small areas and cause cold injury; cool running water is safer and more controllable.
What to use instead: Cool tap water or clean cool compresses. If you only have cold water, let it run briefly to reach a cool (not icy) temperature if possible.
5) Removing heat-retaining items safely (rings, watches, tight clothing)
Concept: Swelling can start quickly after a burn. Rings, watches, bracelets, and tight clothing can trap heat and later act like a tourniquet, increasing pain and restricting circulation. Removing them early—before swelling—can prevent complications.
Step-by-step: safe removal
- Act early. Remove jewelry and tight items as soon as you can do so without pulling on burned skin.
- Remove from the burned limb first. Rings and watches on a burned hand/arm are priority.
- Use lubrication if needed. If a ring is snug but the skin is intact enough to tolerate it, use soap or clean cooking oil to slide it off gently. Stop if it causes pain or drags on damaged skin.
- Cut if necessary and available. If a ring won’t come off and swelling is increasing, a ring cutter (often available in clinics or some first aid kits) may be needed—do not force it.
- Loosen, don’t peel. If clothing is not stuck, loosen or remove it carefully. If it resists, don’t tug—cut around it.
Practical example: A person burns their wrist on an oven rack. Immediately remove the watch and any tight bracelet before cooling, then cool under running water while keeping the rest of the arm warm.
6) Handling stuck clothing or melted material without causing further damage
Concept: Fabric or melted synthetic material can adhere to burned skin. Pulling it off can tear fragile tissue and worsen the injury. The priority is to stop the heat source and cool the area without ripping anything that is stuck.
Step-by-step: what to do
- Stop the burning process. Move away from the heat source. If material is still hot, begin cooling over and around it with cool running water.
- Do not pull off stuck material. If clothing is adhered, leave it in place.
- Cut around the stuck area. Use scissors to remove loose clothing around the burn, leaving the adhered portion undisturbed.
- Cool through the material. Run cool water over the area; cooling still works even if fabric remains.
- If melted plastic is present: Cool with running water to harden and stop heat transfer. Do not peel it off. Leave removal to medical professionals.
- Keep the area protected after cooling. If you have a clean, non-fluffy dressing, you can place it loosely over the area to reduce friction while awaiting further care.
What not to do: Do not use butter, oils, toothpaste, powders, or “home remedies” to loosen stuck fabric—these can trap heat, irritate tissue, and complicate later cleaning.