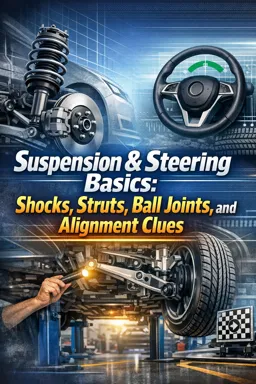
1) What Toe, Camber, and Caster Do (Tire Wear + Handling)
Toe: where the tires point
Toe is the direction the front of the tires point compared to the rear of the tires when viewed from above.
- Toe-in: fronts of the tires point slightly toward each other.
- Toe-out: fronts of the tires point slightly away from each other.
Cause → effect examples (toe):
- Too much toe-in → tires scrub as they roll → fast wear across the tread with a “sanded” feel → can feel stable but may feel reluctant to turn-in.
- Too much toe-out → tires scrub in the opposite direction → fast wear + twitchy/overly eager turn-in → may feel darty on the highway.
Camber: tire tilt
Camber is the inward or outward tilt of the tire when viewed from the front of the vehicle.
- Negative camber: top of tire leans inward.
- Positive camber: top of tire leans outward.
Cause → effect examples (camber):
- Too much negative camber → inner edge carries more load → inner-edge wear (often smooth and concentrated) → can improve cornering grip but shortens tire life if excessive.
- Too much positive camber → outer edge carries more load → outer-edge wear → can feel vague in corners.
Caster: steering axis tilt (stability and return-to-center)
Caster is the forward/backward tilt of the steering axis when viewed from the side. Think of it as what helps the wheels self-center like a shopping cart caster (conceptually similar effect: it wants to track straight and return to center).
- Listen to the audio with the screen off.
- Earn a certificate upon completion.
- Over 5000 courses for you to explore!

Download the app
Cause → effect examples (caster):
- More positive caster (within spec) → better straight-line stability and stronger return-to-center → steering may feel heavier.
- Less positive caster → weaker return-to-center and more wandering → steering may feel lighter but less stable.
- Caster side-to-side difference → vehicle may drift/pull toward the side with less positive caster (common rule of thumb; exact feel varies by platform).
Steering wheel off-center vs. pull: how to tell the difference
These are often confused, and they point to different alignment clues.
| Symptom | What it usually suggests | Quick check |
|---|---|---|
| Steering wheel off-center but car tracks straight | Front toe is not centered (left/right toe not balanced) or rear thrust angle is off | On a flat road, lightly hold wheel: if car goes straight but wheel is rotated, think “centering/toe balance” |
| Vehicle pulls (needs constant steering input to stay straight) | Alignment angle imbalance (camber/caster), tire conicity, brake drag, road crown sensitivity | Swap front tires left-to-right (if directional tires allow) to see if pull changes; if it changes, suspect tires |
2) Visual and Measurement Clues You Can Use
Tire feathering: classic toe clue
Feathering feels like tiny ridges across the tread blocks. Run your hand lightly across the tread:
- If it feels smooth one direction and rough the other, that’s feathering.
- Feathering across much of the tread width often points to toe error (or a toe setting that is correct statically but changes under load due to movement).
Practical check (step-by-step):
- Park on level ground, steering straight.
- Feel the tread on both front tires: inside, center, outside.
- Compare left vs right. Toe-related feathering often shows on both fronts, sometimes more on one side.
- Note whether the feathering is on the front tires only or also on rears (rear toe can feather rear tires too).
Inner-edge wear: common camber clue (but verify)
Inner-edge wear (inner shoulder worn more than the rest) often suggests excessive negative camber, but it can also be accelerated by toe-out. The key is the “shape” of the wear:
- Camber-dominant wear: concentrated on the inner shoulder, often smoother and more continuous.
- Toe-dominant wear: more scrubbed/feathered feel across multiple ribs/blocks, not just the edge.
Simple visual measurement clue: look at the tire from the front at normal ride height. If the top of the tire visibly leans in more than the other side, that’s a camber imbalance clue (not a measurement, but a reason to measure).
Stability and return-to-center: caster-related clues
Caster problems often show up more in how the car feels than how the tire looks.
- Weak return-to-center after a turn (wheel doesn’t naturally unwind) → possible low caster or caster imbalance, or steering friction.
- Highway wandering (constant small corrections) → possible low caster, rear steer effects, or tire issues.
Practical check (step-by-step):
- In a safe area at low speed, make a 90-degree turn and gently release steering pressure (keep hands ready).
- Observe whether the wheel naturally returns toward center smoothly.
- Compare left turn vs right turn behavior. A big difference side-to-side is a clue worth measuring professionally.
Quick “string and tape” toe sanity check (not a substitute for alignment)
If you want a beginner-friendly sanity check for obvious toe problems, you can do a basic string check. This does not replace an alignment rack, but it can confirm “something is way off.”
Tools: jack stands (or similar supports), string, tape measure, chalk. 1) Park on level ground, steering wheel centered as best you can. 2) Set a string line along each side of the car at hub height, parallel to the rear wheels (use the rear wheel/tire as a reference). 3) Measure from string to the front wheel rim (or tire sidewall) at the front and rear of the front wheel. 4) If the front measurement is smaller than the rear measurement, that wheel is toed-out relative to the string; if larger, toed-in. 5) Compare left and right sides for symmetry.Important: Tire bulges and wheel lip damage can mislead measurements. Use the wheel rim if possible and keep the string tight and level.
3) When Alignment Is Required (Clear Triggers)
Alignment is not “optional” after certain repairs because the parts you touched define toe/camber/caster relationships. Use this list as a rule set.
After tie rod replacement (inner or outer)
- Why: Tie rods directly set toe.
- What you might notice if skipped: steering wheel off-center, rapid feathering, dartiness.
- Minimum action: even if you counted turns, get a professional toe set and steering wheel centering.
After control arm changes (or bushing/ball joint changes that alter arm position)
- Why: Control arm geometry affects camber and caster, and can indirectly affect toe.
- Trigger: any time the arm is removed/reinstalled, or eccentric bolts/cams are disturbed.
After strut replacement (especially MacPherson strut designs)
- Why: Strut-to-knuckle position often influences camber; small shifts matter.
- Trigger: if the strut bolts were loosened, knuckle moved, or camber bolts are present, assume camber/toe changed.
After subframe movement or removal
- Why: Subframe position can shift control arm pickup points, changing caster/camber/toe and steering wheel center.
- Trigger: subframe loosened for engine/trans work, steering rack work, or bushing replacement.
After collision or curb impacts (even if it “drives okay”)
- Why: Impacts can bend components or shift mounting points; alignment readings reveal the direction of the problem.
- Trigger: new pull, sudden steering wheel off-center, or immediate tire wear after the event.
Persistent or repeating tire wear
- Why: If you correct tires but wear returns, alignment angles or angle changes under load are likely contributors.
- Trigger: you rotate tires and the same pattern reappears quickly, or you replace tires and wear starts early.
4) What Alignment Cannot Fix (Don’t Pay for the Wrong Solution)
An alignment sets angles; it cannot compensate for parts or conditions that won’t hold those angles.
- Loose or shifting components: If something moves, the alignment won’t stay where it was set. The printout may look fine, but the car won’t.
- Mismatched tires or tire pull (conicity): A vehicle can pull even with perfect alignment if a tire is biased. A common test is swapping front tires left-to-right (when safe and allowed by tire type) to see if the pull changes direction.
- Bent wheels: A bent rim can cause vibration and can also create misleading readings or inconsistent contact.
- Worn dampers causing cupping: Alignment doesn’t stop tread from developing cupping if the tire is bouncing. You can align it perfectly and still ruin tires.
5) Pre-Alignment Checklist (So the Alignment Actually Works)
Before paying for an alignment (or before you attempt any DIY checks), do these steps so the measurements are meaningful and the results last.
Step 1: Set tire pressures and confirm tire basics
- Set all tires to the door-jamb specification (cold).
- Verify tire sizes match side-to-side on the same axle.
- Inspect for uneven wear that could mislead diagnosis (severe edge wear, separated belts, bubbles).
Step 2: Check for play that would invalidate alignment
- With the vehicle safely supported, check for any obvious wheel movement that shouldn’t be there.
- If you find play, fix the cause first; aligning a vehicle with looseness is wasted money.
Step 3: Confirm ride height and loading conditions
- Make sure the vehicle sits at normal ride height (no collapsed spring, no extreme cargo load).
- Uneven ride height side-to-side can create camber/caster differences and a pull.
Step 4: Verify fasteners are properly torqued at the correct position
- Confirm all suspension/steering fasteners you touched are tightened to spec.
- Where applicable, ensure fasteners that should be tightened at ride height were done correctly so bushings aren’t preloaded.
Step 5: Communicate symptoms and request the right service
- Tell the shop: steering wheel off-center vs pull, when it happens (braking, accelerating, constant), and what parts were replaced.
- Ask for a before-and-after printout so you can see which angles were out and what was adjusted.